Checkout Page
Checkout API
Checkout API is a SAQ-A compliant payment-form solution, making it both secure and simple-to-integrate.
Three simple steps are required to integrate:
- Prepare the checkout Send a server-to-server POST request with required parameters to prepare the payment form.
- Create the payment form Display the payment form on your checkout page, then the shopper could submit the payment information.
- Retrieve the payment status Find out if the payment was successful.
Prepare Checkout
First, perform a server-to-server POST request to prepare the checkout with the required data, including the order type, amount, and currency. The response to a successful request is a JSON string with an id, which is required in the second step to create the payment form.
curl http://host:port/pay/v3/checkouts \
  -d "entityId=8a8294174b7ecb28014b9699220015ca" \
  -d "entityType=PARTICIPATOR" \
  -d "merchant.id=8a8294174b7ecb28014b9699220015ca " \
  -d "checkoutType=AUTHORIZE" \
  -d "checkoutId=274" \
  -d "amount=92.00" \
  -d "currency=EUR" \
  -d "paymentType=DB" \
  -H "Authorization: Bearer OGE4Mjk0MTc0YjdlY2IyODAxNGI5Njk5MjIwMDE1Y2N8c3k2S0pzVDg="
For a full list of parameters that can be sent in the preparing checkout request, please refer to the API Reference.
Please note that all the parameters are expected to go into the message body and not into the URL for a HTTP POST request.
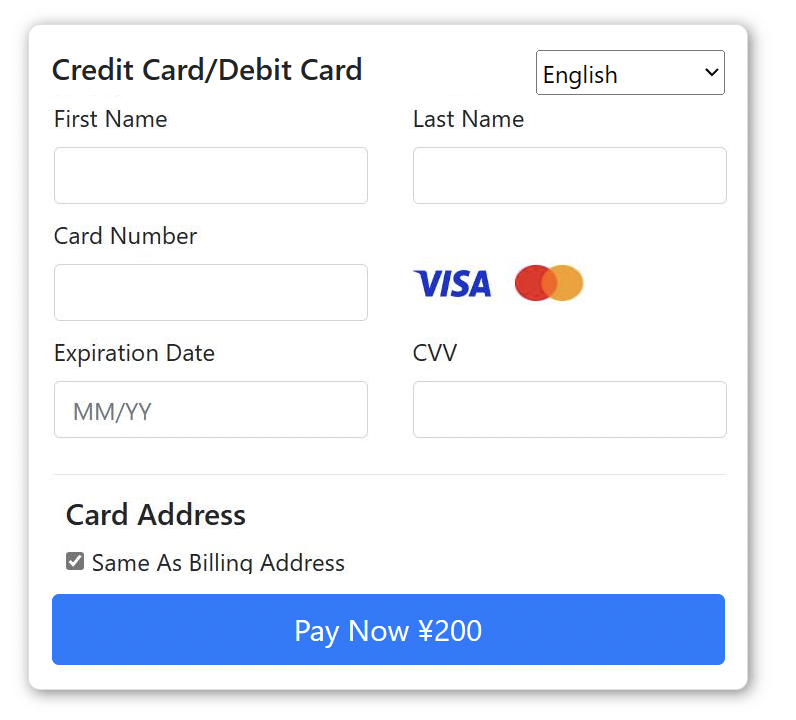
Create Payment form
To create the payment form you just need to include the following lines of HTML/JavaScript to your page. The checkout's id is the one you got in the response from step 1.
<script src="host:port/pay/v3/checkouts/{id}"></script>
The shopperResultUrl, which directs to the page on your site where the customer should be redirected
to after the payment is processed.
A checkout id expires when a user has finalized a payment successfully, but it will also expire within 15 minutes in case a user does not complete a payment. Before it expires, it can be used multiple times to retrieve a valid payment form. Example is when a user does not finish a payment and reloads the page or uses the back button of the browser. Therefore, you don't have to generate a new checkout ID in such scenarios. However, be aware that such cases can generate multiple transactions with the same checkout id in the system, for example one (or more) failed and another one successful.
Get Payment Status
Once the payment has been processed, the customer is redirected to your shopperResultUrl along with a GET parameter resourcePath.
Example of a resourcePath: resourcePath=/v3/payments/{checkoutId}
Important: The baseUrl must end in a "/", e.g. "https://ip:port/pay/".
Then, to get the status of the payment, you should make a GET request to the baseUrl + resourcePath, including your authentication parameters.
https://ip:port/pay/v3/payments/{checkoutId}
Once a payment is completed, the checkout id can't be used anymore. But it can be used to retrieve the corresponding transaction status by sending a request to the transaction detail endpoint.
curl -G https://ip:port/pay/v3/payments/{checkoutId} \
  -d "entityId=8a8294174b7ecb28014b9699220015ca" \
  -d "entityType=PARTICIPATOR" \
  -d "merchant.id=8a8294174b7ecb28014b9699220015ca " \
  -H "Authorization: Bearer OGE4Mjk0MTc0YjdlY2IyODAxNGI5Njk5MjIwMDE1Y2N8c3k2S0pzVDg="
Hosted Checkout Page
Hosted payment pages allow you to collect card and personal information from your customers. If you own a website or an online service, you can setup a hosted payment page to act as your checkout page/signup page.
Deploying a hosted payment page for your website can be done within minutes and you don’t have to worry about PCI-compliance since the hosted payment pages are by default PCI compliant which means they are highly secure and complies with all security standards.
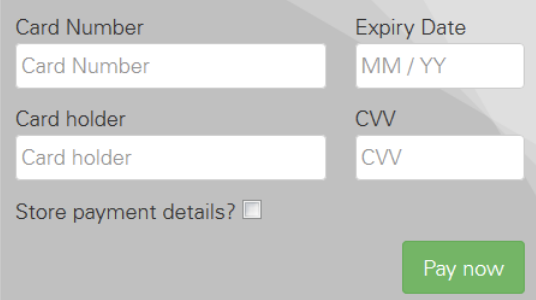
<iframe src="URL" width="xxx" height="xxx"></iframe>
Replace the URL and enter the width and height of the form. Hosted payment page embedded in an iframe will look like this.
Tokenization
Tokenization allows you to store payment data for later use. This can be useful for recurring and/or one-click payment scenarios.
The following sections will describe how you can store account details using checkout page and how you can subsequently use the stored account details.
Create Tokens
EastPay provides two options for storing the payment data:
-
Store the data during payment: When a shopper is checking out for the first time, he has to fill in all his payment and address details. Use this option to automatically store his data during the payment for future purchases.
-
Store the data separately: If your site provides shoppers with an administrative area where they can register their payment details independent of a checkout-process, this option could be used.
Store Data During Payment
You have two options for achieving this:
-
Merchant-initialized tokenization
During the checkout process you can store the data by adding an additional parameter to the normal prepare checkout request as described in step 1 of the checkout:
createRegistration=trueAfter your customers have filled in their account information and are redirected back to your shopperResultUrl, you can retrieve the response information as usual (step 3). This time, however, the response will include a registrationId (token) and other necessary information that you can store for future requests.
-
Shopper-initialized tokenization
When the payment form is displayed as described in step 2 of the checkout, you can display an option to your customer in the form that allows him to store his account data.
Once your customers have selected this option, you can retrieve the response information as usual (step 3). And the response will include a registrationId (token) and other necessary information that you can store for future purchases.
Store Data Separately
With checkout API it is also possible to create a registration separately from any later payment. A registration-only transaction with checkout API is basically using the same workflow and parameters as a payment. You only have to change two parameters in step1:
createRegistration=true has to be sent.
paymentType should not be sent.
Now checkout API automatically adapts the workflow for handling a registration:
- In step2 checkout API will render the payment form as usual, but send the form to
https://ip:port/pay/v3/checkouts/{checkoutId}/registration - In step3 you'll get back a resourcePath pointing to you to query for a registration's result:
resourcePath=/v1/checkouts/{checkoutId}/registration
Use Tokens
Tokens can be used for instalments/recurring payment. StandingInstruction parameter should be included in the request sent to /checkouts endpoint (refer to Prepare Checkout step):
- For initial payment
- standingInstruction.mode=INITIAL
- standingInstruction.type=UNSCHEDULED
- standingInstruction.source=CIT
- For subsequent payments
- standingInstruction.mode=REPEATED
- standingInstruction.type=UNSCHEDULED
- standingInstruction.source=MIT
- Set ID received from the initial payment to StandingInstruction.initialTransactionId
More details can be referred to sections of recurring payment and Card on File.